Word Document Accessibility
Continue to main contentConsider for a moment that you need to find information online but without your sight. It’s important to remember we have more than just sighted, hearing, and individuals with full use of their hands browsing our site, and they may be using assistive technology. This technology includes screen readers that read web pages aloud for people who cannot read the text, screen magnifiers for people with low vision, and voice recognition software and selection switches for people who cannot use a keyboard or mouse.
Information included on semo.edu must follow accessibility guidelines, and that includes documents linked online. It is important to make any PDF file on our website accessible to disabled individuals because:
- It’s the law.
- It’s the right thing to do.
Creating Accessible Documents in Microsoft Word
Accessible PDFs begin with properly constructed Word documents. Read further to learn how to make your Word document as accessible as possible and turn it into an accessible PDF.
Step 1 – User Proper Headings
Headings are not just a design aesthetic in your document. A proper heading structure gives everyone an understanding of how a document is organized. Screen readers and Braille users can navigate sections by jumping from heading to heading. Non-handicapped readers can also use them to skim for the information they need.
Headings are not just enlarged or bolded text. In Microsoft Word, there are built-in heading styles that must be used. Headings should also form an outline structure in their use. Use “Heading 1” as the style for the main heading of your document and “Heading 2” as sub-headings. If additional levels of headings are required for your document, use “Heading 3,” “Heading 4,” and so on, as needed.

H3: Step 2 – Use Lists
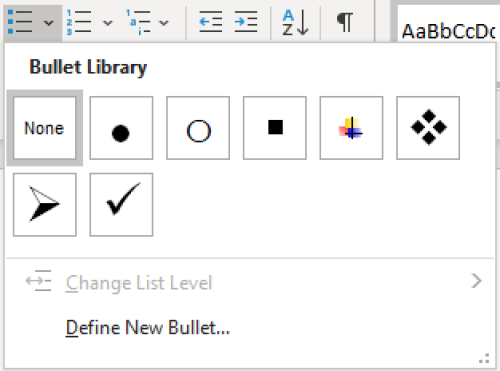
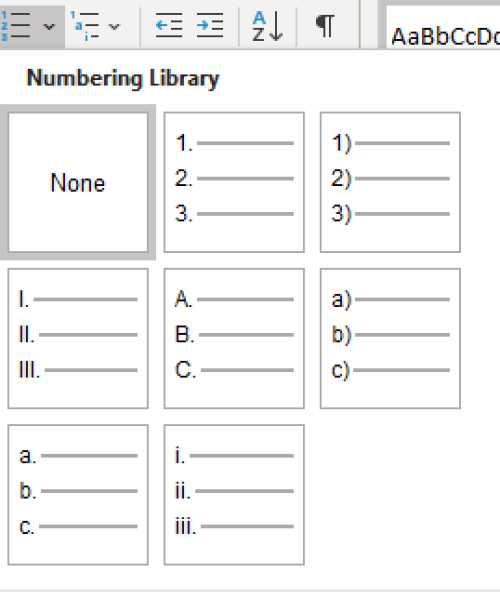
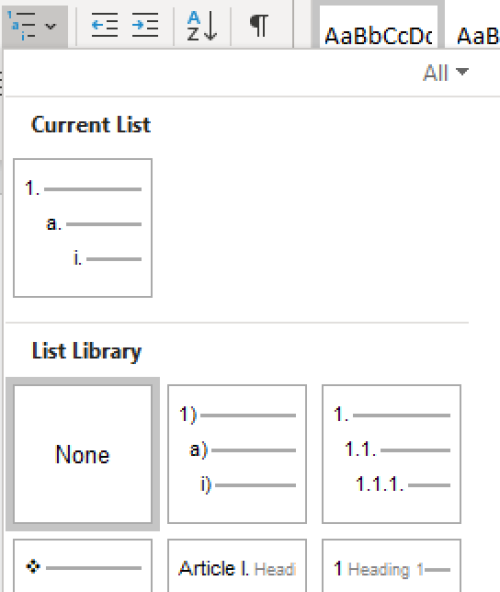
Lists help break up large blocks of information into more easily digestible pieces. When creating a list in Word, using the built in “List” tool is required. Construction of a list any other way is not really a list, which means that the content will be more difficult for screen readers to understand.

Step 3 – Use Meaningful Hyperlinks
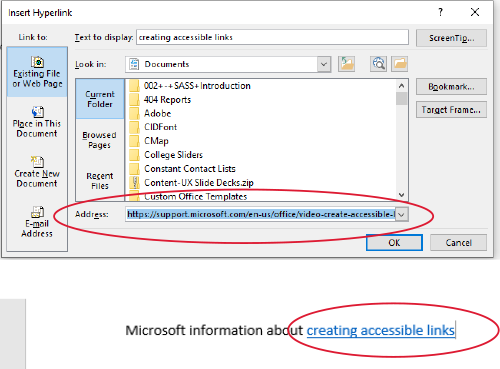
Typing “Click here” with a URL copy and pasted straight into a Word document is not a meaningful hyperlink.
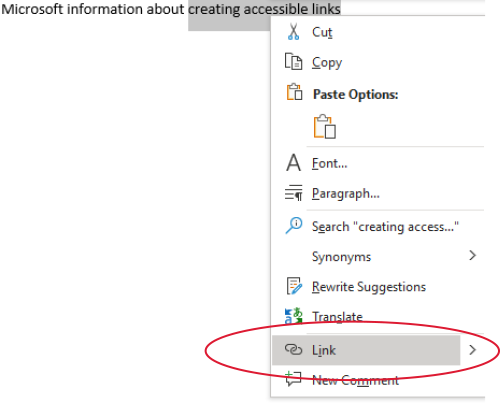
Use language that conveys relevant information about the destination of the link. Highlight that text and right-click (or Ctrl+Click on macOS). A dialog will pop up; select “Hyperlink,” include the URL in the “Address” field and click “OK” to insert your link.
Step 4 – Add Alternate Text for Images
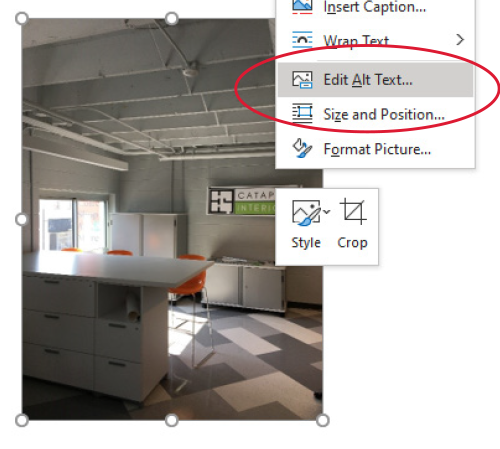
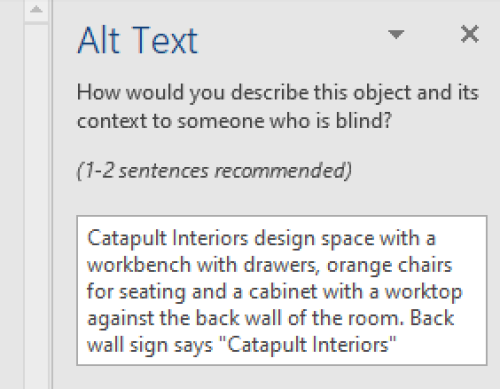
If you are inserting a photo into your Word document, you must include an Alternate “Alt” Text description. Avoid using descriptions such as “Photo of” or “Picture of.” Briefly describe the image. If your image includes any text, all of that text must be included. It is best to avoid pictures or images of text.
In Word, right-clicking (or ctrl+click in macOS) will bring up a menu; select “Edit Alt Text.” A new panel will open to the right of your document where you may enter your description.
Step 5 – Set Your Document Language
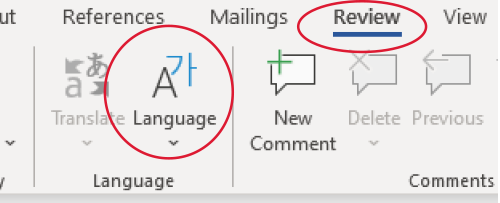
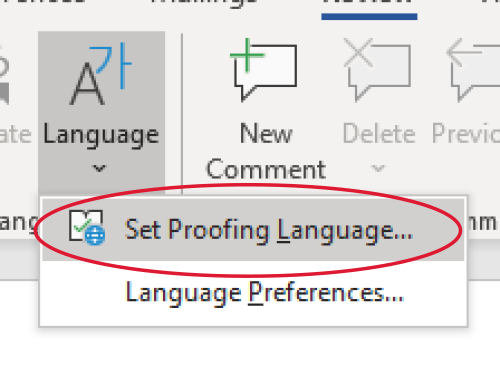
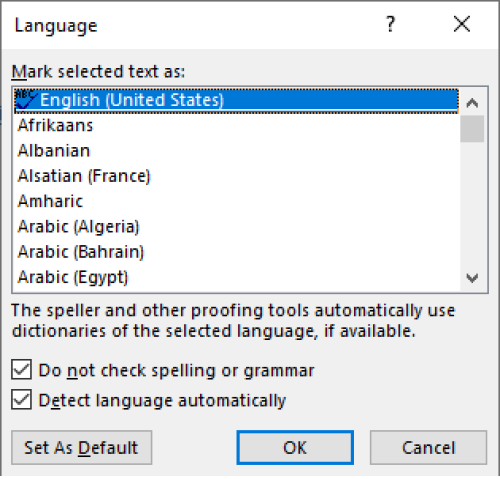
Word will often automatically identify what language you are writing in, but to keep it accessible, you will need to set your document language. This can be found under “Review” in the application ribbon. Select “Language” and click “Set Proofing Language.” A dialog will pop up with a list to choose from. If you are writing in English, it may already be selected for you. Click “OK” when finished.
Step 6 – Use Tables Wisely
That is, sparingly. Word itself has a lot of limitations when it comes to making tables accessible. They require a specific markup that defines how all parts of the table relate to each other. If your table is more complex than a simple row of column headers with no nested rows or columns, then editing the resulting PDF document in Acrobat’s accessibility checker is necessary.
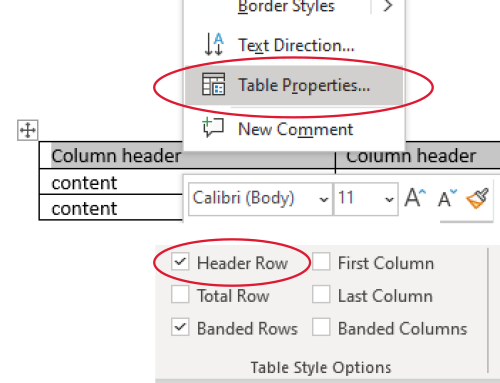
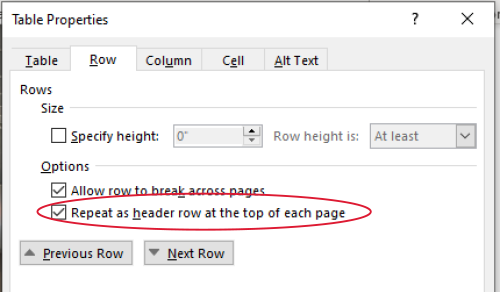
For simple tables in Word, you’ll need to set which row contains the column headers. Once you have inserted your table and selected your header row, right-click (or ctrl + click on macOS) in the row and select “Table Properties” from the menu that comes up. Under the “Row” tab in the dialog, check “Repeat as header row at the top of each page” and click “OK.” In the ribbon, there is also a section called “Table Style Options” where you can select “Header Row.”
Step 7 – Use the Accessibility Checker
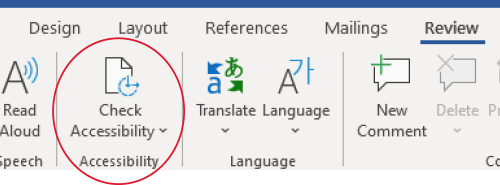
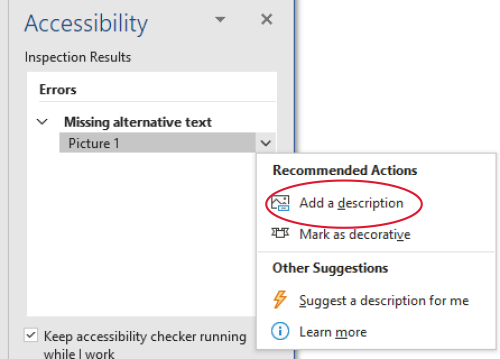
Word has a built-in accessibility checker to guide you and to help double-check that you haven’t missed anything. The “Check Accessibility” tool can be found in the “Review” ribbon. There will be a column open to the right of your document with the inspection results. In the example, we have removed the image alt text description in order to generate an error. Expanding the error and clicking the “Down” arrow beside the item in question will bring up a menu that will allow you to go straight to the error and correct it.
If you have no errors, the inspection results will display a green check mark and let you know no accessibility issues were found.
Creating Accessible PDFs from Microsoft Word
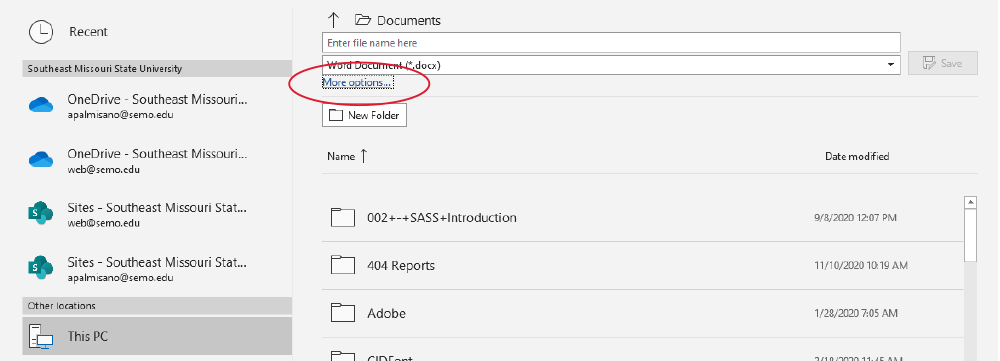
In order to preserve your document structure as you export to PDF, Word in Windows has a couple of steps. Hitting the “F12” key will bring up your “Save As” dialog, or you can click “File” and then select “Save As” from the sidebar. If you use the “Save As” option in the side bar you will need to save to your PC, and beneath the file name and file type box, click “More Options” to bring up the dialog you will need.
When you “Save As” be sure to select “PDF” from the “Save as type” box beneath the file name. When you choose “PDF” from this selection, a new button will show up called “Options.” Clicking “Options” will open a new dialog. Look for “Document structure tags for accessibility” and make sure that box is checked. This will preserve your alt text descriptions, table tags, and header structure when the PDF is created.
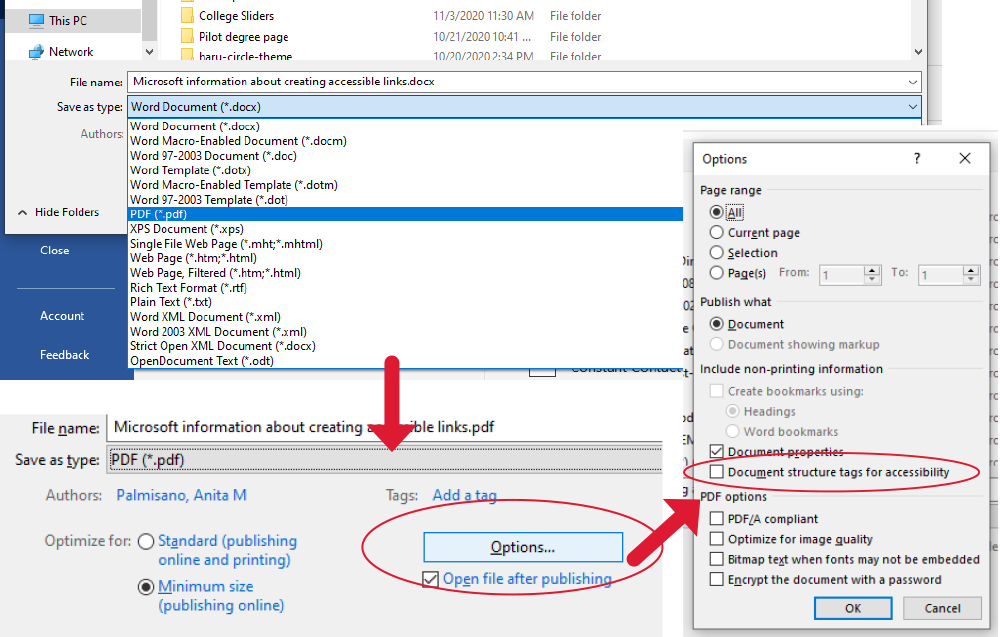
After these steps, as long as the document is simple, your resulting PDF will be accessible. These are the most basic things you can do in order to make sure your document is as accessible as possible to individuals who might not be able to navigate with their eyes and a mouse.